Happy Easter

Happy Easter


  1. Easter Chick Cupcakes

These little chick cupcakes are almost too adorable to eat – but they’re also delicious so eat away! You just make regular cupcakes and then dip in yellow sanding sugar. Then add chocolate chips for eyes and pipe on the rest of the face and wings. They’re really easy and will instantly become a family favorite. They’re also great for Easter parties at school.

Source/Tutorial: birdonacake

  1. Confetti Eggs

Confetti eggs are fun for the entire family. You use real eggs, which you empty – and this is a delicate but really easy step. Then dye your eggs and fill them with confetti. Finally, you cover the whole with a piece of tissue paper and let it dry. Only you will know that these aren’t really hard boiled and decorated Easter eggs and it will be so much fun watching people crack and open them with the confetti falling out.

Source/Tutorial: apumpkinandaprincess

  1. Magical Jelly Bean Garden

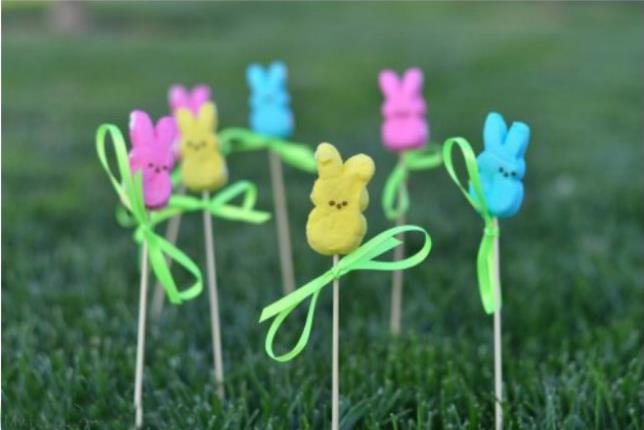
Little ones are going to be so excited to plant their magical jelly beans and see what grows. This is a wonderful tradition for families and all you have to do is “plant” jelly beans in your garden or yard. Come back a while later to see which ones have bloomed – in the meantime, you’re going to stick a treat in the ground and let the kids know that these grew from their magical jelly beans.

Source/Tutorial: myfrugaladventures

  1. Easter Tree Tradition

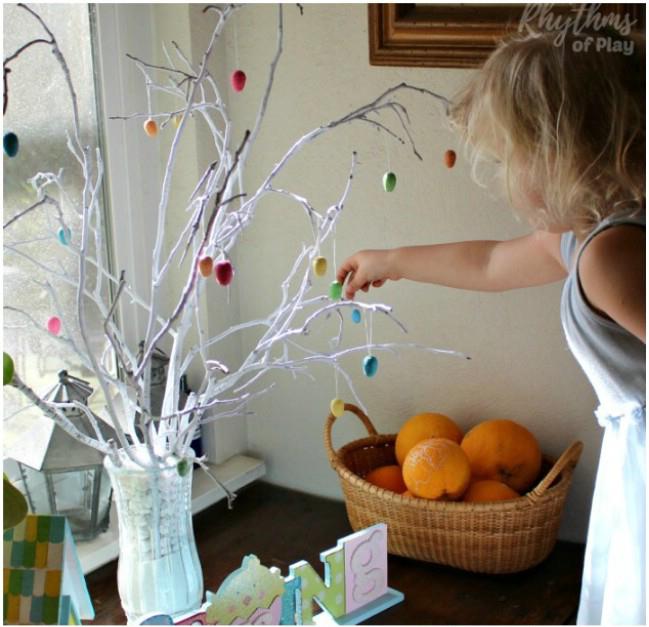
You can buy Easter trees and decorations at the Dollar Store for just a few dollars, or make one yourself. Just find a branch, paint it white – or pink if you prefer – and then add decorations. You can even DIY your decorations, and kids are going to love helping to decorate the tree.

Source/Tutorial: rhythmsofplay

  1. Easter Bingo

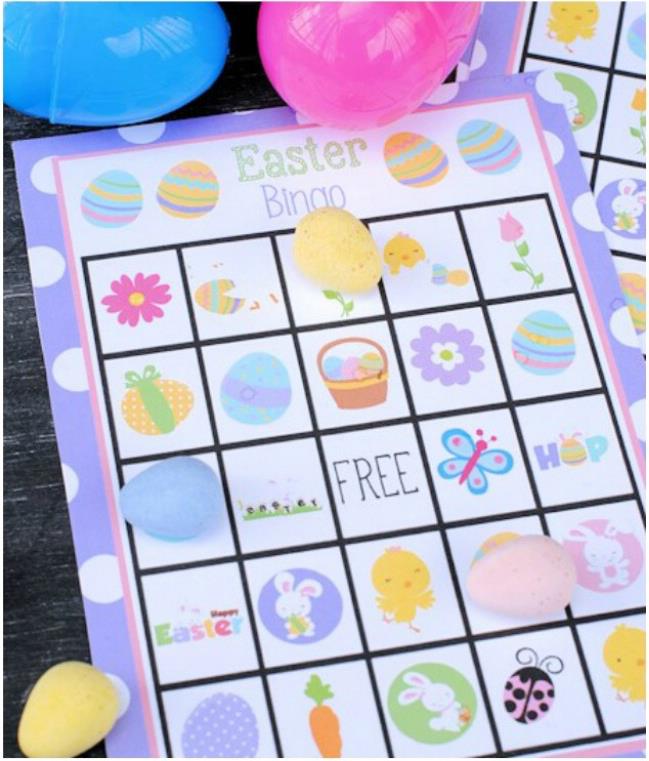
This is a really fun Easter game that kids of all ages are sure to love playing. Print off the game board and then use jelly beans or robin eggs to play. It’s so much fun and a wonderful way for little ones to wear themselves out the night before Easter so they’ll go to bed early.

Source/Tutorial: crazylittleprojects

  • Share/Save/Bookmark

Red Tart Cherry Glazed Ham

Red Tart Cherry Glazed Ham Ingredients 1 4 to 5-pound fully cooked boneless ham, sliced 1/4 inch thick 1 12-ounce jar Smucker’s Orchard’s Finest Michigan Red Tart Cherry Preserves 1 tablespoon apple cider vinegar 1/8 teaspoon ground cinnamon 1/8 teaspoon ground nutmeg Dash ground cloves, if desired 2 tablespoons raisins, if desired Preparation HEAT oven to 325°F. Overlap slices of ham in shallow baking pan; cover with aluminum foil. Bake 50 to 60 minutes, or until internal temperature reaches 140°F. COMBINE preserves, vinegar, cinnamon, nutmeg and cloves in a small microwave safe bowl. Microwave on high for 2 minutes. ARRANGE ham slices on serving platter. Spoon 1/4 cup glaze over center of ham. Serve with remaining warm glaze. Serves Makes 16 servings Preparation Time: 10 minutes Cook Time: 50 minutes

  • Share/Save/Bookmark

Back From the Grave Cake

Ingredients

  • 2-3/4 cups all-purpose flour
  • 2 teaspoons baking powder
  • 1-1/2 teaspoons ground cinnamon
  • 1/4 teaspoon salt
  • 1 cup (2 sticks) butter, softened
  • 1-1/4 cups granulated sugar
  • 3 eggs
  • 2 teaspoons vanilla extract
  • 3/4 cups sweetened applesauce
  • 1-1/4 cups diced Granny Smith apple (about 1 medium apple)
  • 1 can (16 ounces) White Decorator Icing

Preparation

  1. Preheat oven to 325°F. Prepare 3D Skeleton Casket pan with vegetable pan spray.
  2. In medium bowl, combine flour, baking powder, cinnamon and salt; set aside. In large bowl, beat butter and sugar with electric mixer until light and fluffy. Add eggs, one at a time, and vanilla; mix well. Alternately add flour mixture and applesauce to butter mixture. Spread about 1/2 of cake batter so that it reaches the first horizontal line inside the pan. Sprinkle diced apples evenly over batter. Top with remaining batter, smoothing out the top.
  3. Bake 58 to 62 minutes, or until toothpick inserted in center of cake comes out clean. Cool 15 minutes; remove from pan and cool completely on cooling grid.
  4. Decorate cooled cake with tip 5 and decorator icing.

Serves
Makes about 12 servings

  • Share/Save/Bookmark

Easy Ways to Better Your Community


Easy Ways to Better Your Community

Small town, big city, the suburbs or the country – no matter where you live, you’re part of a local community. Without realizing it, you can have a big impact on your community by the everyday choices that you make. And a thriving local community is good for everyone who lives there.

Why You Should Go Local

Local First, a Grand Rapids, Michigan based organization that encourages sustainable, locally-based economies, states that when you purchase at locally owned businesses rather than nationally owned, more money is kept in the community because locally-owned businesses often purchase from other local businesses, service providers and farms. Local First estimates that for every $100 you spend with local businesses, $73 remains in the community. Only $57 remains in the local economy when you buy from a national chain store.

Most new jobs are provided by local businesses as well, and local business owners donate more to local charities than non-local owners. This means that your support of local businesses has a farther-reaching effect than you might realize. You’re helping people find and keep jobs, and you’re helping make it possible for charitable organizations to continue doing much-needed work.

How You Can Go Local

Start Subscribing. Get a subscription to your community newspapers and local magazines. Not only will they keep you informed about what’s happening in your community, but you’ll help support local business.

Shop Locally. There are plenty of locally owned businesses and service providers in your neighborhood. One easy way to find them is through MerchantCircle.com, a social network of about 1 million local businesses. By signing up for a free account, you can easily search out and follow nearby businesses and service providers such as jewelers, plumbers, grocers, and accountants,  to get coupons and find out about special events and offers. MerchantCircle’s “Answers” lets you get expert advice from local businesses in your area and across the country on virtually any topic for free. Car mechanics, veterinarians and professionals in every industry will quickly respond, saving you time and often money.

Get Involved. Many communities have volunteer advisory councils for local governments – everything from city planning committees to arts councils. Check out your town’s web site to find out how you can impact the development and character of your community.

Visit Local Attractions. Parks, arboretums, museums, parades, festivals, theatres – there plenty of ways to have a good time without leaving town. A staycation or weekend getaway at home is less expensive for you than heading out of town, and you get to enjoy local treasures.

Volunteer. Local schools, community centers, libraries, museums and charities often need people like you. Check the local paper, community bulletin boards and web sites such as VolunteerMatch.org to find out what you can do to make your community stronger.

  • Share/Save/Bookmark

Tricks and Treats With Halloween Sweets

B-O-O Brownie Pops
Halloween Goldfish Munch
Happy Haunted House

(Family Features) – The bewitching season is here! Gather the goblins, conjure up some creative costumes and prepare scary, scrumptious sweets for a great ghostly gathering.

Making these frighteningly fabulous party treats together is a perfect way for mom and the kids to share some spooktacular fun.

  • Cast a spell right from the start with a Happy Haunted House. Begin with a ready-to-decorate Halloween Cookie House Kit available at craft and hobby stores. The house is pre-assembled; just decorate and enjoy!
  • Sweetly smiling Goldfish Grahams do double duty as both roofing “tiles” and a wholesome snack (they’re made with whole grains, without artificial preservatives). Kids can affix the Goldfish crackers to the roof after it’s been iced (and enjoy snacking on them as they work), making sure to give equal representation to each flavor: cinnamon, honey and chocolate. The sparkling blue piping gel moat and pond need to be stocked with Goldfish, too. Complete the decorating with green coconut grass, a candy corn fence plus the icings and the candies that come with the kit.
  • B-O-O Pops are easy … nothing sinister here! Use a brownie mix for convenience and bake in the Brownie Pop Silicone Mold to ensure perfect pops. The kids can insert the lollipop sticks, then dip pops into the colorful Candy Melts. Decorating sprinkles and sugars add the finishing flourish.
  • Halloween Goldfish Munch is a snappy party snack or a tantalizing take-away for ghoulish guests. Kids can mix the Goldfish crackers (graham and pretzel flavors), with nuts and dried fruits while Mom melts the Spooky Green Candy for drizzling.

 Add favorite beverages and let the spookalicious party begin!

For additional information about Goldfish Grahams, recipes and nutrition information, visit www.pepperidgefarm.com.

Find more ways to bake, decorate and celebrate, or order the Halloween Cookie House Kit at www.wilton.com.

B-O-O Brownie Pops

Ingredients

  • 1 package (about 16 ounces) brownie mix (8 x 8-inch size)
  • Egg, water and oil to prepare mix
  • 48 lollipop sticks
  • Wilton Orange, Spooky Green and Light Cocoa Candy Melts
  • Wilton Spider Mix, Hallow Pumpkin Mix, Halloween Nonpareil Sprinkles, and Orange, Black and Lavender Sugars, as desired

Preparation

  1. Preheat oven to 350°F. Spray brownie pop mold with vegetable pan spray; place on cookie sheet.
  2. Prepare brownie mix following package directions. Spoon batter into prepared brownie pop mold, filling cavities 2/3 full. Bake 15 minutes. Remove mold from oven; insert lollipop sticks. Return to oven and continue baking 10 to 15 minutes or until brownies test done. Cool brownies in mold on cooling grid 20 minutes; remove from mold and cool completely.
  3. Melt each color candy following package instructions. Dip cooled pops into melted candy, covering completely. While the candy is still soft, sprinkle with or dip pops into sprinkles and sugars. Place on parchment paper to set.

Serves
Makes 48 pops

Notes, Tips & Suggestions

Note: If desired, bake brownies completely without inserting stick. After brownies have cooled, dip lollipop sticks into melted candy and insert into either end of brownie. Let set before decorating.

Halloween Goldfish Munch

Ingredients

  • 3 packages (6.6 ounces each) Pepperidge Farm Cinnamon, Chocolate or Honey Goldfish Grahams (or any combination)
  • 1 package (8 ounces) Pepperidge Farm Pretzel Goldfish Snack Crackers
  • 1 can (10 ounces) salted mixed nuts
  • 1 cup chopped dried apricots
  • 1 cup golden raisins
  • 2 packages (10 ounces each) Wilton
  • Spooky Green Candy Melts

Preparation

  1. In large bowl, combine crackers, nuts, apricots and raisins; divide between 2 large cookie pans.
  2. Melt candy following package directions; drizzle over snack mixture. Refrigerate until firm.
  3. Break apart and store in airtight container until ready to serve.

Serves
Makes about 14 cups treat mix

Happy Haunted House

Ingredients

  • Wilton Halloween Cookie House Kit
  • 10 x 14-inch cake board
  • Cornstarch
  • Pepperidge Farm Cinnamon, Chocolate and Honey Goldfish Grahams
  • Wilton Piping Gel
  • Wilton Royal Blue and Kelly Green Icing Colors
  • Flaked coconut
  • Candy corn

Preparation

  1. Prepare icing mixes following instructions. Attach house to cake board.
  2. Outline door with black icing; attach candy dots. Outline door window in black icing; fill in with orange icing and smooth with finger dipped in cornstarch.
  3. Outline windows with black icing; add orange icing accents. Attach candy dot window sills.
  4. Spatula ice roof; attach crackers to roof with dots of icing. Decorate house eaves with jelly beans attached with dots of icing. Add orange outline to roof peaks; attach candy dots.
  5. Tint portion of piping gel blue; spatula blue gel “moat” and “pond” on cake board; arrange crackers in the water. Brush clear piping gel onto open areas of cake board; sprinkle with green-tinted coconut. Arrange candy corn around house with dots of icing.
  • Share/Save/Bookmark

Tricks and Treats with Halloween Sweets

B-O-O Brownie Pops
Halloween Goldfish Munch

Family Crossings – The bewitching season is here! Gather the goblins, conjure up some creative costumes and prepare scary, scrumptious sweets for a great ghostly gathering.

Making these frighteningly fabulous party treats together is a perfect way for mom and the kids to share some spooktacular fun.

  • Cast a spell right from the start with a Happy Haunted House. Begin with a ready-to-decorate Halloween Cookie House Kit available at craft and hobby stores. The house is pre-assembled; just decorate and enjoy!
  • B-O-O Pops are easy…nothing sinister here! Use a brownie mix for convenience and bake in the Brownie Pop Silicone Mold to ensure perfect pops. The kids can insert the lollipop sticks, then dip pops into the colorful Candy Melts. Decorating sprinkles and sugars add the finishing flourish.
  • Goldfish Halloween Munch is a snappy party snack or a tantalizing take-away for ghoulish guests. Kids can mix the Goldfish crackers (graham and pretzel flavors), with nuts and dried fruits while Mom melts the Spooky Green Candy for drizzling. 

Add favorite beverages and let the spookalicious party begin!

For additional information about Goldfish Grahams, recipes and nutrition information, visit www.pepperidgefarm.com.

Find more ways to bake, decorate and celebrate, or order the Halloween Cookie House Kit at www.wilton.com.

B-O-O Brownie Pops

Ingredients

  • 1 package (about 16 ounces) brownie mix (8 x 8-inch size)
  • Egg, water and oil to prepare mix
  • 48 lollipop sticks
  • Wilton Orange, Spooky Green and Light Cocoa Candy Melts
  • Wilton Spider Mix, Hallow Pumpkin Mix, Halloween Nonpareil Sprinkles, and Orange, Black and Lavender Sugars, as desired

Preparation

  1. Preheat oven to 350°F. Spray brownie pop mold with vegetable pan spray; place on cookie sheet.
  2. Prepare brownie mix following package directions. Spoon batter into prepared brownie pop mold, filling cavities 2/3 full. Bake 15 minutes. Remove mold from oven; insert lollipop sticks. Return to oven and continue baking 10 to 15 minutes or until brownies test done. Cool brownies in mold on cooling grid 20 minutes; remove from mold and cool completely.
  3. Melt each color candy following package instructions. Dip cooled pops into melted candy, covering completely. While the candy is still soft, sprinkle with or dip pops into sprinkles and sugars. Place on parchment paper to set.

Serves
Makes 48 pops

Notes, Tips & Suggestions

Note: If desired, bake brownies completely without inserting stick. After brownies have cooled, dip lollipop sticks into melted candy and insert into either end of brownie. Let set before decorating.

Halloween Goldfish Munch

Ingredients

  • 3 packages (6.6 ounces each) Pepperidge Farm Cinnamon, Chocolate or Honey Goldfish Grahams (or any combination)
  • 1 package (8 ounces) Pepperidge Farm Pretzel Goldfish Snack Crackers
  • 1 can (10 ounces) salted mixed nuts
  • 1 cup chopped dried apricots
  • 1 cup golden raisins
  • 2 packages (10 ounces each) Wilton
  • Spooky Green Candy Melts

Preparation

  1. In large bowl, combine crackers, nuts, apricots and raisins; divide between 2 large cookie pans.
  2. Melt candy following package directions; drizzle over snack mixture. Refrigerate until firm.
  3. Break apart and store in airtight container until ready to serve.

Serves
Makes about 14 cups treat mix

SOURCE:
Pepperidge Farm
Wilton Industries, Inc.

  • Share/Save/Bookmark

Making a Difference!

In these tough economic times, people throughout the country are looking for innovative ways to get involved in their local communities, enrich lives and make a real difference. Fortunately for everyone, as the charitable spirit continues to spread throughout the U.S., getting involved has become easier and less expensive than ever as corporations, nonprofits, schools and even our own administration have actively encouraged citizens worldwide to volunteer their free time to those who need it most.  

When it comes to volunteering, there is no right or wrong way to get involved. Rather, there are a number of ways to incorporate it into your everyday life and really make it count. Here are a few small things to consider when looking for opportunities that make a big impact.

Find an employer that fosters volunteerism.
Many corporations are moving towards the trend of offering their employees volunteer opportunities throughout the year. For example, team members at Target have volunteered millions of hours to community projects, from assembling and distributing disaster relief kits to reading to young people and helping makeover local school libraries. When researching a potential employer, look to see if they have an organized volunteer program. Or if your current employer doesn’t offer a company-wide volunteer program, consider starting one.

Make it a family affair. 
As family vacation and activity budgets shrink, find a fun volunteer event that’s not only free but allows your family to play their part on making the world a better place. Many people find that giving to the community can be a rewarding and exciting way to instill values in children, encourage teamwork and foster a positive attitude within the home. Working together as a family is especially rewarding when you choose to support an organization that has special significance or meaning.

Find a cause that inspires you.
Identify an organization or cause in your community that matters to you most. To find a great place to volunteer in your area use Web services, like VolunteerMatch, which are dedicated to bringing together good people and good causes. VolunteerMatch offers an array of programs to support community and civic service 365 days a year, and any nonprofit organization can join its network.

Change the world…one simple act at a time.
The old saying ‘no good deed goes unnoticed’ is true to its core. It’s not about a huge cash donation, but rather finding those small, yet everlasting ways to touch people’s lives, like grocery shopping for the elderly or driving the local neighborhood kids to their sporting events. Truly no effort is too small.  

Grow your skills.
The great thing about volunteer work is that it’s not only good for the cause, but also for the people who donate their time. Volunteerism is a way to develop new skills, discover new areas of interest and connect with other people in the community.

Don’t over-commit your time. 
Remember to let volunteering be a fun and rewarding part of your day. If you’re short on time, consider virtual volunteering. Utilize your online skills to help students with homework questions, electronically visit with someone who is homebound or in the hospital, or design a newsletter or brochure for a nonprofit. Whatever you do, make sure it’s a choice – that’s why it’s called volunteer work!

For more information on Target’s volunteer program, visit www.target.com/community. Or to find volunteer opportunities in your area, visit www.volunteermatch.org.

  • Share/Save/Bookmark

Nutrition 101: Get Smart About Veggies for Back to School

Nutrition 101: Get Smart About Veggies for Back to School

Veggie Critters

The start of another school year means parents will be looking for ways to set their children up for success in the classroom, including making sure kids are getting healthy fuel for their bodies and minds. With approximately 84 percent of kids trading lunch items with their friends at school*, it’s important parents fill their children’s lunchboxes with items that are both nutritious and enticing.

As a registered dietitian, childhood nutrition expert and mom, Jodie Shield knows first-hand the challenge of ensuring kids eat nutritiously – especially during school hours – but says it’s all about engaging children in the process of proper nutrition and keeping veggies yummy.

Shield has put together some creative tips and fun activities to help get kids excited about eating and loving vegetables.

Take a Dip: Make veggie eating fun and more flavorful by serving ready-to-eat veggie sticks with delicious dips, like low-fat ranch dressing, hummus, pesto, honey mustard or peanut butter.

Teach from Store to Snack: Let your kids help fill the shopping cart at the grocery store with vegetables they’d like to try. And ask them to guess how much four apples weigh, then weigh the fruit to see if they were close. At home, let them help prepare their own lunch. They’ll be proud of the meal they made come lunchtime at school.

Play with Your Food: Combine snack time with activity time. Create veggie critters as an after-school treat by assembling a variety of pre-cut vegetables with ranch dressing “paste” into bug shapes.

For more great back-to-school recipes, creative nutrition tips and fun activities, visit LoveYourVeggies.com.

*American Dietetic Association, August 2004

Veggie Critters

Ingredients

You’ll need
  • 1 packet Hidden Valley Original Ranch Salad Dressing & Seasoning Mix
  • 2 8-ounce tubs reduced fat cream cheese
  • A wide variety of chopped, colorful vegetables such as asparagus, cherry tomatoes, crinkle cut carrots, baby carrots, bell peppers, cauliflower, broccoli, cucumber, eggplant, shredded carrots and olives

Preparation

  1. Add the seasoning mix to the cream cheese.
  2. Stir until well combined.
  3. Using a variety of vegetables – and a little imagination – you can build critters with your child.

Serves
Serves: Several hungry after-school snackers

Notes, Tips & Suggestions

Ideas:

Butterflies: Use asparagus for the body. Use the ranch and cream cheese mixture to attach crinkle-cut carrots for wings, and add decorations to the wings with bits of bell pepper.

Lady Bugs: Slice a cherry tomato in half. Use the ranch and cream cheese mixture to attach the tomato to a slice of cucumber or eggplant; attach the other cherry tomato half for the head. Then attach lady bug spots with bits of olive.

Caterpillars: Cut cauliflower into florets. Use the ranch and cream cheese mixture to attach the pieces of cauliflower together. Then attach shredded carrot for legs and asparagus for antennae.

Note: Since there will plenty of the ranch mixture leftover, store it in the refrigerator. It makes a delicious veggie dip.

  • Share/Save/Bookmark

Healthy and Simple Meals

When it comes to recipes, the words healthy and simple don’t always seem to go together. But preparing a nutritious meal doesn’t have to be hard. The first step is to pick a lean protein.

Dieticians and nutritionists recommend getting lean protein from natural, lean sources such as skinless poultry, fish, beef or pork loins and beans. Protein is essential to keep the body fueled.

Lean chicken breasts are an excellent source of protein, and their versatility lets them match up with just about any side dish.

Tuna, and seafood in general, are also good protein sources, and they have the added benefits of omega-3 fatty acids. Research shows that omega-3s can improve heart health and reduce the risk of some kinds of cancers. In fact, the American Heart Association recommends eating fish at least two times a week as part of a healthy diet.

To make healthy cooking easier, don’t be shy about using products that do part of the work for you. Using fully cooked and seasoned chicken breasts or ready to serve tuna medleys, such as those made by Bumble Bee, means that the family gets a healthy and delicious meal in no time. They can be paired with your favorite simple sides, or turned into tasty wraps, salads and skillets for something the whole family will enjoy.

Continue reading Healthy and Simple Meals

  • Share/Save/Bookmark